


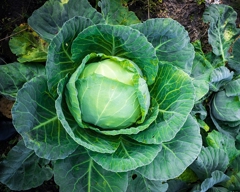

Garlic
Not only is garlic known for its many therapeutic purposes, it also tastes fantastic and is a wonderful addition to many meals.
Create a Yates account today!
Sign up to join the Yates Garden Club for monthly e-mails packed with seasonal inspiration, tips for success & exclusive promotions.
Plus if you’re a Garden Club member you can take part in the Yates Growing Community - a blog to share successes, get advice & win prizes in fun challenges along the way!
Enter the email address associated with your account, and we'll email you a new password.
Choose a sunny spot in the garden with well-drained soil. Garlic needs at least six hours of sunshine a day.
Improving the soil before planting will help give your garlic a great start. Soil improvement is as simple as mixing two handfuls of Yates Dynamic Lifter Organic Plant Food into each square metre of soil.
Garlic does best in slightly acidic soil (pH 5.5-7). In alkaline soils (pH greater than 7), the soil pH can be reduced by applying Yates Soil Acidifier Liquid Sulfur.
Separate the garlic bulb into individual cloves. Choose the biggest cloves from around the outside of the bulb. Make holes in the soil 2cm-5cm deep, and 10cm-20cm apart, then push in the cloves. Ensure the clove is planted pointy end up! Water them in well and mulch lightly with an organic mulch, like pea straw. Mulch helps to keep the soil moist.

As soon as leaves emerge, feed the garlic plants every 1-2 weeks with Yates Thrive Vegie & Herb Liquid Plant Food. Regularly feeding your garlic plants promotes healthy leaf growth and plump bulbs.
Water regularly throughout the growing season to keep the soil moist, but not wet. Garlic bulbs can rot during prolonged wet weather or in poorly drained or heavy clay soil, so grow garlic in a well-drained position and monitor soil moisture levels. To help reduce the incidence of leaf diseases, water around the base of the plants and avoid watering the leaves.

Garlic can be harvested around eight months after planting. Bulbs are ready when a few of the lower leaves start to go yellow or brown, or any flower stalks start to bend. Using a small trowel, gently lift from underneath the bulb while pulling on the stem. Be careful with the bulbs, as they bruise easily (bruising means they won't store well).
Hang the harvested plants, with the leaves and roots still attached, in a dry, airy sheltered spot for about a month, to cure. When the top green leaves have turned brown and papery, you can trim the neck of the garlic down to around 15-20cm from the bulb. Also trim the long roots to tidy them up. If there are no signs of green left inside where you've trimmed the neck, your garlic is cured and ready to use!

A very traditional method to store garlic is to braid it. This is easy and fun to do. It's best to braid your garlic after a couple of weeks of curing time, so the stems are still soft enough to plait neatly.
To keep garlic for a long period, it needs to be stored inside, in a dry, airy place, out of direct sun. Store garlic in mesh bags or brown paper bags to get maximum longevity. Avoid airtight containers, as garlic quickly goes mouldy and rots when sealed in.
You can freeze garlic for long-term storage, by separating the cloves and popping them into a sandwich bag.

Choose a pot at least 30-40cm wide and 20cm deep; bigger is better. Position the pot in a sunny spot that receives at least six hours of sunshine a day.
Fill the pot with quality potting mix, such as Yates Premium Potting Mix.
Separate the garlic bulb into individual cloves. Choose the biggest cloves from around the outside of the bulb. Make holes in the potting mix 2cm-5cm deep, and 10cm-20cm apart, then push in the cloves. Ensure the clove is planted pointy end up!
Water in well and mulch lightly over the surface of the potting mix with an organic mulch, like pea straw. Mulch really helps to keep the potting mix moist.
As soon as leaves emerge, feed the garlic plants every 1-2 weeks with Yates Thrive Vegie & Herb Liquid Plant Food. Regularly feeding your garlic plants promotes healthy leaf growth and plump bulbs.
Water regularly throughout the growing season to keep the soil moist, but not wet. Soil that's too wet can lead to garlic bulbs rotting. To help reduce the incidence of leaf diseases, water around the base of the plants and avoid watering the leaves.
Garlic can be harvested around eight months after planting. Bulbs are ready when a few of the lower leaves start to go yellow or brown, or any flower stalks start to bend. Using a small trowel, gently lift from underneath the bulb while pulling on the stem. Be careful with the bulbs, as they bruise easily (bruising means they won't store well).
Hang the harvested plants, with the leaves and roots still attached, in a dry, airy sheltered spot for about a month, to cure. When the top green leaves have turned brown and papery, you can trim the neck of the garlic down to around 15-20cm from the bulb. Also trim the long roots to tidy them up. If there are no signs of green left inside where you've trimmed the neck, your garlic is cured and ready to use!
Garlic is happiest when planted in cool weather. Autumn is ideal for most zones.
Soil with a pH of around 5.5 to 7 (acidic to neutral) is ideal.
Mulch with a light open mulch to a depth of up to 10-20 cm.
After harvesting, remove soil and hang to dry out – this can take a couple of weeks.


Share
Share this article on social media