


Yates Surrender Moss Killer - Concentrate
Controls moss, lichen, liverwort and algae in lawns, on roofs, cobblestones, tiles and other hard surfaces including terracotta pots.
Create a Yates account today!
Sign up to join the Yates Garden Club for monthly e-mails packed with seasonal inspiration, tips for success & exclusive promotions.
Plus if you’re a Garden Club member you can take part in the Yates Growing Community - a blog to share successes, get advice & win prizes in fun challenges along the way!
Enter the email address associated with your account, and we'll email you a new password.
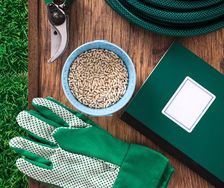
Does your garden look a bit ‘meh’? You’ve pruned the trees, planted new flowers and laid new mulch, but there’s just something missing...maybe there are a couple of spots you’ve forgotten or just hadn’t thought about? Here's some reminders, plus a few extra tips to get your place looking sharp.

The easiest thing to take care of is to tidy the paths and driveway. It's easy to move fallen leaves into piles with a leaf blower, although you may find your neighbours aren't fans of the noise they produce (or of blowing leaves into the street). Even if you have large trees or a lot of leaf litter to collect, a nice wide outdoor broom does the job quickly and quietly.
Fallen leaves are a beneficial ingredient for home-made compost; if you don't have a compost bin you can still heap them in an inconspicuous part of the garden - they'll break down into useful compost.

Once the leaves are swept away, it's time to tackle moss and green algae. They aren't just unsightly: algae can be hazardously slippery on paths, steps or timber decking. Moss crowds out grass and prevents your lawn from thriving.
A water blaster makes an excellent job of cleaning hard surfaces, they save an awful lot of scrubbing.
If you don't have a water blaster (and this product helps even if you do have a water blaster), spray affected areas with Yates Surrender Moss Killer Concentrate to kill off moss, algae or lichen. It's safe to use on most hard surfaces, so it's very versatile. This is the one to go for if you have moss or algae on paths, pavers, your driveway, brick or block walls, or exterior house walls. You can even use it on timber decking to clean up slippery algae!
Because Yates Surrender Moss Killer is safe for grass, it's an excellent remedy for invasive moss in lawns. It's easily applied with a sprayer or watering can.

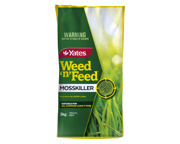
Alternatively, you can use Yates Weed'n'Feed Mosskiller & Fertiliser, a granular blend of iron and nitrogen. It quickly burns and kills off moss: after 2 weeks, the dead moss can be raked away. The rich nitrogen boost in Yates Weed'n'Feed Mosskiller & Fertiliser also feeds the grass - a strong, healthy lawn is better able to resist moss infestations.
After you've killed off moss in the lawn, you can reduce the chances of it returning by aerating the lawn with a garden fork. Simply stand on the fork to push it down to about 10cm deep and wriggle it back and forth to widen the holes. Move the fork forward 10-15cm and repeat, working your way around the whole lawn. It's quite hard work, but it really pays off.
Immediately after aerating you can apply gypsum to the lawn, which will improve the porosity of heavily compacted soils (moss adores compacted soil, it feels right at home). Better soil porosity means more water and oxygen can penetrate, which boosts the overall health of the lawn.
You can also consider trimming overhanging trees and shrubs, to let more light in. Moss prefers a shaded lawn, but grass does best in sunlight.

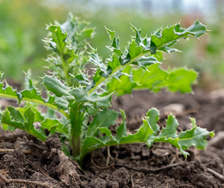
Are there weeds popping up between pavers, or in concrete cracks? You can scrape them out manually, but they'll grow back pretty quickly. The best way to keep the area clean is by spraying along the strips of weeds with Yates Zero Super Concentrate, then waiting a week or so before you scrape out the ugly weeds; this gives the Zero a chance to be absorbed into the weed roots for full, long-lasting control.

Do you have sunken, wobbly or trip-hazard pavers? This weekend, it's time to fix them.
Pull up the offending pavers (or bricks) and clean any soil or debris off them. If they've sunk from water erosion, fill the depression with fine GAP7 metal to level it up, then pound the metal down to compact it as best you can. Apply a layer of paving sand over the top, then level that off by dragging a length of timber across it to 'screed' it, so it's level with the base of the pavers that remain in place. Lay the pavers back down and give them a few taps with rubber mallet to settle them. Sweep paving sand into the cracks, and you're all done. Step back and admire the improvement.
If you have loose bricks, blocks or capstones on a wall, wobbly steps or any other masonry woes: we can suggest a sneaky trick to fix them. Selleys Liquid Nails Landscape will bond, seal and stabilise stone, concrete, terracotta or timber. If you've been trying not to think about the cost of repairs to your damaged steps or wall, this product is exactly what you need. It's easy to squeeze out a fast, flexible, shock-proof, weather-resistant fix to extend the life of your masonry.

Attractive and functional garden furniture really elevates an outdoor space, plus makes it more likely you'll regularly use the space. If your outdoor setting is looking a bit tired, give it a good scrub, or a careful waterblast. To make a serious improvement, you can freshen it up with paint, or re-stain it.
For painting outdoor furniture, we recommend Dulux 1Step Prep to prime and prepare it, then Dulux Aquanamel® Semi Gloss for the luscious topcoat. Re-painting gives you a brilliant opportunity to be creative, and adventurous with the look of your outside area. You can choose bold colour to add wow factor - bright pops of colour make outdoor furniture look amazing, and helps to define zones in your entertaining area. Once you've chosen your colour scheme, you can complement it with cushions and throws to bring it all together.

Sun-damaged, splintered or damp wooden furniture isn't very inviting to sit on. Cabot’s Garden Furniture Oil is our recommendation to protect outdoor timber from harsh sun, dirt, mould and moisture. It gives timber a gorgeous glowing natural finish. It's easy too; give your furniture a rubdown with the applicator mitt, add a cushion, put your feet up, and relax.

If your deck is faded or looking a bit sad after it's had a wash, re-staining it with Cabot’s Deck & Exterior Stain will really elevate it. You can grab the opportunity for a change of colour scheme! Pro Tip: Applying a darker stain over a worn out, lighter coloured stain is a simple trick to make it look very classy.
Freshly stained timber fences and shed walls make a huge visual improvement to an outdoor area. Go for a good quality stain with UV protection and lots of pigment to make it last longer, like the water-based Cabots product mentioned just above.

Although the windows tip is more about freshening up the view of your outdoor area from inside, it's amazing what a difference clean windows make to the feel of your place! It never fails to surprise us how satisfying it is, when you step back and see the difference.
On the exterior, dust, grime or cobwebs may not be that noticeable - until you clean them and have a 'wow' moment.
If you don't have a squeegee or your outside windows are up high, Selleys Outdoor Window & Glass Cleaner is a brilliant solution. It's very easy to apply, plus it saves a lot of effort and time. You click it on to your garden hose and spray the windows, the magic happens within a couple of minutes, then you simply twist the nozzle to 'WATER' to rinse off the windows.
Selleys also have a great hose-on product to clean dirt, grease and grime off exterior surfaces. It works on rendered walls, weatherboards, concrete, brick, decking and pavers. Selleys Outdoor Multi-surface Cleaner is as simple as it gets: hose it on, give it 5 minutes, then hose it off.

There's nothing quite like sitting on the grass on a warm day, basking in sunny rays, brushing your hands through luscious soft blades of grass. If this sounds nothing like your lawn, have a look here for care tips. But if your lawn looks more like a knee-high weed farm or barren moonscape, maybe it's time for a fresh start.
If your adorable, loving pet has created furrows along the fenceline, or half the lawn is always in shade, or even if you're on tank water through hot summers, starting from scratch gives you an opportunity to choose a grass better suited to cope with the conditions at your place.

Achieving that lovely lush lawn from new seed isn't as hard as it looks. First, clear the area of all the weeds AND the old grass, using Yates Zero Rapid Weedkiller. After 7 days, rake to remove the remains of the dead weeds and grass. Turn the topsoil over. Fill in any 'craters' with a good topsoil mix, raking it out to level the area as you work your way around the lawn. When the area is graded (levelled and smoothed out) to your satisfaction, you're ready to sow lawn seed.
Before you level and sow your lawn, think about whether you need to improve the drainage. It does involve some digging, but it's quite straightforward to ensure that water drains well through the lawn. Improving soggy areas really boosts the health and resilience of your lawn and makes it much easier to care for over the long term.
Also, consider how much sun the lawn receives throughout the year, especially during summer and winter. This will influence which grass variety will perform best in your situation, and help you to make the best grass choice.


Share
Share this article on social media