


Yates Black Magic Seed Raising Mix
Specially formulated for trouble-free seed raising in trays (or outdoor seed sowing direclty into the ground) and propagation of cuttings.
Create a Yates account today!
Sign up to join the Yates Garden Club for monthly e-mails packed with seasonal inspiration, tips for success & exclusive promotions.
Plus if you’re a Garden Club member you can take part in the Yates Growing Community - a blog to share successes, get advice & win prizes in fun challenges along the way!
Enter the email address associated with your account, and we'll email you a new password.
Autumn is your opportunity to add dazzling colour to your late winter and spring garden, and fill your place with fragrance. There's nothing quite like glorious blooms popping up to announce spring, and right now's the perfect time to get bulbs started - here's how!
They're surprisingly easy to grow - after a bit of preparation and planting out, they won't need much care before they burst into flower.
There's a spectacular range of spring-flowering bulbs to choose from, with countless varieties of flower types and colours. We're spoilt for choice!
Some of the most popular spring flowering bulbs include ranunculus, tulips, daffodils, narcissus (AKA jonquils), Dutch iris, crocus, freesias, snowflakes, hyacinths, anemones, ixias, grape hyacinths, bluebells and sparaxis.
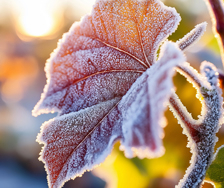
Some spring bulbs are only happy to flower after they've had a period of dormancy, during a properly cold winter. This process is called 'vernalization'. Fortunately, we can fool cold-loving bulbs into flowering by putting them in the fridge for 4-6 weeks, to simulate the conditions they need to trigger growth.
'Naturalising' is the term used when bulbs are planted under trees or in a lawn, then left from one season to the next. Bluebells, freesias, daffodils, jonquils, sparaxis and ixias are favourites for naturalising. Flowers can be trimmed off as soon as they've finished, but leaves must be allowed to die down naturally. When grown in a lawn, this means waiting until the leaves have turned brown before mowing. In climates where the lawn grows vigorously in spring, it's a bit more challenging to have bulbs naturalised in the lawn, so planting them in a separate garden bed or in a mulched area under trees is more manageable.

Freesias
For cooler climates, fritillarias, hyacinths, jonquils, tulips, crocus, daffodils and the true snowdrops (Galanthus spp.) are ideal choices. Alliums, relatives of the edible onion, are also cold-lovers. All these species are most suited to climates with frosty winters and may not flower as profusely in warmer areas.
If you're in an area with very mild winters, you'll need to take a bit more care when choosing your spring-flowering bulbs. Bulbs like freesias, spring stars (Ipheion spp.), babiana, sparaxis, triteleia (Brodiaea laxa), chincherinchee (Ornithogalum thyrsoides) and star-of-Bethlehem (Ornithogalum umbellatum) do well in warmer climates.
It's best to wait until mid or late autumn to plant spring-flowering bulbs in frost-free areas. Planting bulbs a little deeper than recommended can also help their performance in warmer soil. Keep the soil well mulched (which helps keep it cooler) and ensure the bulbs are well-watered throughout the growing and flowering seasons.

Hyacinths

Ixia

Babiana

Tulips
Do I Really Need to Put Bulbs in the Fridge?
If your bulbs haven't been pre-chilled (some suppliers will have done this for you already), yes - put them in the fridge crisper for 4-6 weeks. This vernalizes bulbs and triggers them to start growing, even if your local weather isn't cold enough.
Can I Cut The Yellow Leaves Back, Or Tie Them Up?
Leaves need to absorb as much sunshine as possible, which feeds nutrients back to the bulb. It's important not to cut off the yellow leaves or tie or plait them up (which reduces their access to sunlight).
Can I Leave Bulbs In Pots After Flowering?
Yes, but it's important to continue watering and feeding until the leaves have died back. Then, keep the pot in a cool protected spot during summer. Don't allow the pot to become waterlogged, because the bulbs can rot while they're dormant. It might be easier to dig the bulbs up and store them in a cool, dry spot for replanting next autumn.
What're the Easiest Spring-Flowering Bulb to Grow?
Daffodils and jonquils are amongst the easiest bulbs to grow, and are great for beginner gardeners.

Sparaxis
Can I Leave Bulbs In the Ground All Year?
In areas with well-drained soil, bulbs like bluebells, freesias, daffodils, jonquils, sparaxis, star-of-Bethlehem (Ornithogalum umbellatum) and ixias can be left in the ground to naturalise. Bulbs like tulips and hyacinths are best dug up (lifted) each year, stored and chilled before being replanted.
How Do I 'Layer' Bulbs in A Pot?
Potted bulbs can be grown more closely together than in garden soil. Even better, different types of bulbs can be grown together in the same pot. To layer bulbs, plant the largest bulbs deepest in the pot, add more potting mix, then plant smaller bulbs above. This will create a wonderfully dense bulb display.
Can I Grow Hyacinths in a Vase?
Yes! Hyacinth bulbs can be suspended over a vase or jar of water. Roots grow into the water and leaves and flowers then develop. Treat Hyacinths grown in this way as an annual display, as they're unlikely to do well if replanted the following year.


Share
Share this article on social media