


Yates PruneTec - Pruning & Grafting Sealant
A long-lasting pruning wound treatment, that forms a barrier to prevent diseases or pest insects entering fresh pruning cuts.
Create a Yates account today!
Sign up to join the Yates Garden Club for monthly e-mails packed with seasonal inspiration, tips for success & exclusive promotions.
Plus if you’re a Garden Club member you can take part in the Yates Growing Community - a blog to share successes, get advice & win prizes in fun challenges along the way!
Enter the email address associated with your account, and we'll email you a new password.
Pruning can feel like a complicated, intimidating task. But we can give you some reassurance: plants are tough by nature. Even if you get it wrong and give your plant a bad haircut, or chop off the buds for next season's fruit or flowers, it's only a matter of time until it bounces back.
The good news is, once you know the fundamentals, you’ll understand why pruning is done. If you know the 'why', the 'how' becomes much easier. Read on, for our detailed introduction to pruning...and you'll be able to cut with confidence.
Plants are diverse, so they vary widely in how they respond to pruning. Many plants require a particular pruning technique to get the best from them. This article is a general guide and an introduction to pruning, so we'll keep it brief on specific plants - but you can dip into our Plant Pages for the finer detail on individual plants.
For the fundamentals of why, when and how to prune, read on.
The first thing to know is that many plants don't need regular pruning. Citrus trees are a great example. Because they're a fruit tree, it's natural to think they should be pruned; but citrus aren't deciduous, so they behave quite differently to pipfruit or stonefruit trees. While most fruit trees benefit from pruning to encourage an excellent harvest, citrus trees don't need much intervention (apart from an annual tidy-up to remove dead growth, or occasional thinning to let in more light and air). Pro Tip: Find out how your particular tree will respond to pruning, before you get stuck in with your secateurs!
Here's a list of the plants that do benefit from seasonal pruning...and why.

If you're planning to plant a new fruit tree, here's how to train it into shape, for long-term productivity.

A tidy, maintained tree is a happy tree! Some types of branches aren't productive, but still divert energy from the tree, so they put a handbrake on fruit development. It's best to remove these branches, whenever you see them. Here's what to look for: the diagram below will help you identify targets for pruning.
If you’ve inherited an old fruit tree at your place, it might have been neglected...chances are it will reward you after a little bit of TLC.

Here's what to look for - the branch types above are your targets for pruning - clip them off as soon as you see them.
Most plants form their new growth from buds. There are different types of buds, which all do different jobs for the plant. In many cases, the art of pruning is about selectively removing and taking control of buds.
This part might seem complicated, but if you understand what each bud does, you'll know what parts you shouldn't chop off! There are 3 main types of buds: dormant buds, latent buds and adventitious buds.
These are the most important buds for our purposes. These buds stay dormant through their first season, before they grow into stems, leaves or flowers. The diagram just above shows you how to identify them. Buds can vary in appearance between different fruit trees, but use this as a general guide and you'll be able to tell the difference.

If a dormant bud stays dormant, just sits there looking like a small bump under the bark and doesn’t wake up for multiple seasons, they’re called latent buds. Latent buds are like plant insurance: if the branch above the bud is broken or cut, the latent bud can spring into life and form a new side shoot.
These buds develop out of a completely new spot; usually where a branch has been damaged or pruned poorly. Unfortunately, they don’t form branches with a strong bond to the tree, so they break off quite easily. If you prune and leave budless stumps of branch behind, you'll encourage adventitious buds to form and shoot sideways from the branch.

Now that you know how to identify bud types, you can use bud location to take control of the plant's growth. When you restrict certain buds, you can make the plant respond in a predictable way. Here's how it works.
If you want new growth to go in a particular direction, you can choose an axillary bud that's oriented in that direction - then cut off the branch above, terminal bud and all, down to just above your bud. The plant floods your chosen bud with cytokinin to make it into a terminal bud; new growth begins in the direction you want.

The perfect place to make a heading cut on a stem is just above where the bud emerges from the stem. Stem structures can be arranged in two patterns; alternate or opposite.
Fruit trees and roses have alternate buds, so the best place to cut is just above an outward-facing bud at a 45-degree angle (shown in the diagram below). This prevents water pooling on the cut stem. Try to align the base of the bud with the base of your cut on the opposite side.
If you’re pruning an opposite patterned plant with the two shoots positioned exactly opposite each other on the stem, then the best cut is straight across above the junction of the two shoots, where there are two healthy buds waiting.

A visual guide for pruning cuts - the blue tick version is perfect. Cut just above an outward-facing bud, at a 45-degree angle.
Whenever you prune, you're wounding the plant. It’s best to do it in a way that allows the plant to heal as quickly and efficiently as possible. Woody plants are quite capable of healing themselves, so the trick is to cut in the place that has the highest concentration of natural healing mechanisms.
The fastest-healing location to cut is at the branch collar - the elbow where the branch joins the main trunk. The collar is where the healing magic can happen, thanks to the meristematic tissue located there. The place to cut is at the outside of the branch collar, never right up flush against the trunk. Cutting flush takes away the natural healing tissue, plus makes the wound bigger than it needs to be. If you prune in the right place, over time the tree will form a doughnut of protective bark callus around the cut; eventually it closes up completely.

Sometimes you'll need to remove a large branch from a mature tree: for safety, disease recovery, or aesthetic reasons. If you're removing a large branch or limb, take extra care to get it right...because they won't grow back!
Cut at the outside of the fastest-healing branch collar. You can identify the collar by the ridged or wrinkled texture of the bark around it, where the branch blends into the trunk. In the diagram above, the dark brown 'wrinkles' indicate where to look for the collar.
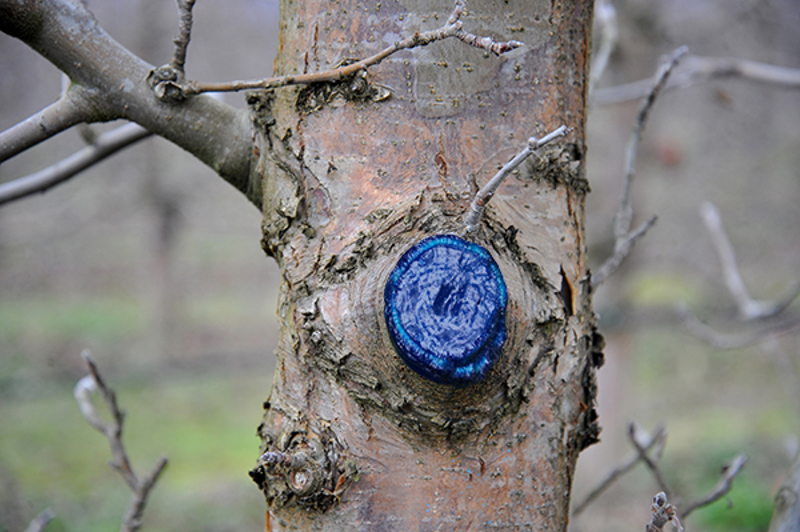
An apple tree with Yates PruneTec applied to seal the pruning cut, with natural healing callus beginning to develop. Note the branch collar, visible around the cut.
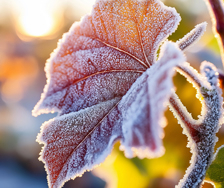
The rule of thumb is to prune shortly before new growth begins. This means winter is the peak time for pruning deciduous trees and shrubs. While they're leafless, it's easier to see what needs to be pruned. In cooler areas it’s best to wait until late winter, but in areas with no frosts you can begin to prune in mid-winter. Winter pruning promotes fast regrowth in spring.

An apple tree in winter, showing lots of fruiting spurs.

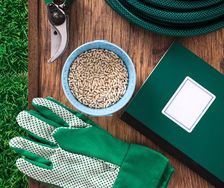
Keeping your pruning tools sharp and well-oiled makes them nicer to use, gives them a much longer life and saves your wallet over the long term.
Select the right-size tool for the branch you’re pruning, to avoid damage to the plant (and the tool):
It’s good practise to clean secateurs and other pruning tools between plants, to avoid spreading bacteria or spores between plants. It’s vital to clean tools after removing any plant parts infected by a fungal disease.
As part of the pruning process, clean up any leaf litter from under trees (especially fruit trees). The dead leaves can contain fungus spores and overwintering insect pests, so they should be removed and burned.


Share
Share this article on social media