


Sweet Corn 'Honeysweet'
An early maturing variety of "Super Sweet" corn. Large, even cobs with very sweet golden kernels.
Create a Yates account today!
Sign up to join the Yates Garden Club for monthly e-mails packed with seasonal inspiration, tips for success & exclusive promotions.
Plus if you’re a Garden Club member you can take part in the Yates Growing Community - a blog to share successes, get advice & win prizes in fun challenges along the way!
Enter the email address associated with your account, and we'll email you a new password.

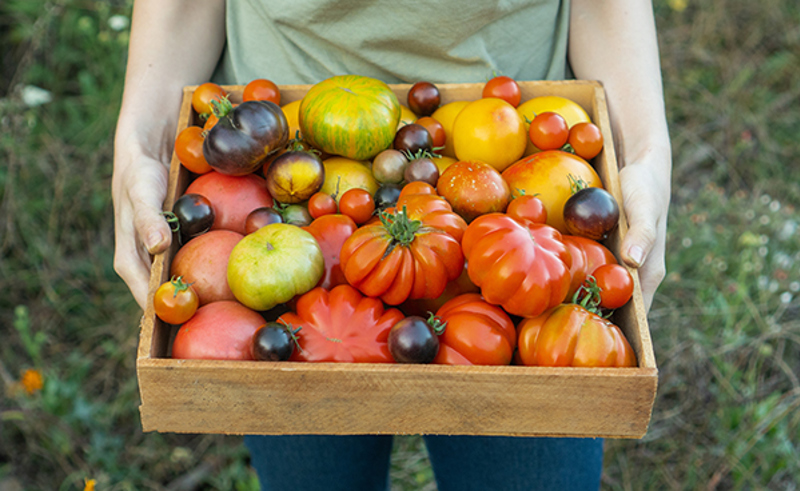
Tomatoes are one of the most popular fruiting vegies to grow at home, for good reason. There’s nothing quite like picking a warm, sun-ripened juicy tomato from your own backyard. This spring, why not try growing some interesting, colourful heritage tomato varieties?
If you'd like to give heirloom tomatoes a go, we have a great new (actually very old) variety to try. Yates® Heirloom Tomato 'Yellow Pear' is an absolute classic variety with bite-sized, bright yellow pear-shaped fruit. it's vigorous and productive, with sweet tasting fruit.
If you appreciate a bit of variety, we also have Yates® Tomato 'Heirloom Favourites'. It's a special lucky dip selection of heritage tomatoes, in a range of vibrant colours and mouth-watering flavours. These time honoured favourites taste the way tomatoes should!
Tomatoes do best in well-drained soil in a warm position that receives at least 6 hours of sunshine a day. Tomato seed can be sown direct where the plants are to grow or raised in trays of Yates® Black Magic Seed Raising Mix and the seedlings transplanted when they’re around 5-7 cm high. For cool climate gardeners, delay transplanting seedlings out into the vegie patch until the weather warms up and the chance of frost has passed.
For a productive tomato season, before planting enrich the soil in the vegie patch with some Yates® Thrive Natural Blood Bone with Seaweed. It contains NZ seaweed to encourage root growth and help get tomato seedlings off to a great start, as well as being a natural source of organic slow release nutrients.
Once the seedlings are established, feed tomato plants with Yates® Thrive Tomato Granular Plant Food. It contains a custom blend of fast feeding nitrogen, phosphorus and potassium to promote healthy leaf growth and lots of flowers and tasty tomatoes. It has added calcium and magnesium to help protect plants from trace element deficiencies and the controlled release nitrogen in Yates® Thrive® Tomato Granular Plant Food will also feed tomato plants gradually for up to 12 weeks.
You can start picking your very own heirloom tomatoes around 12 – 14 weeks after sowing seed.

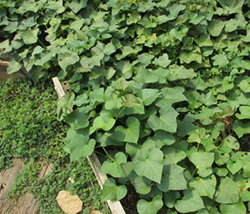
Dwarf beans are a super-productive vegie to grow at home. They don’t take up too much space and can be grown in a vegie patch or pots, so patio, veranda and balcony gardeners can still enjoy home grown beans.
Yates Dwarf Bean Mix produces a colourful blend of gold, royal purple and deep green bean pods, which are very attractive and turn a meal into a visual feast.
Here’s your easy dwarf bean sowing and growing guide:
Sow Yates Dwarf Bean Tricolour Mix seeds 25 mm deep, direct where they are to grow, in a sunny vegie patch with well-drained soil that’s been enriched with some Yates Dynamic Lifter Organic Plant Food. Alternatively, seeds can be sown into 30 cm or larger diameter pots filled with good quality potting mix like Yates Premium Potting Mix.
Keep the soil or potting mix only just moist. Avoid overwatering as seeds can rot before germinating.
Seedlings should pop up in around 7-10 days.
To encourage a great harvest, as soon as the seedlings are established start feeding each week with Yates Thrive Flower Fruit Soluble Fertiliser, which is boosted with extra potassium which promotes flowering and bean pod development.
Water plants regularly to keep the soil moist.
Dwarf (bush) beans do not require a trellis to climb on, but if long tendrils appear, particularly during prolonged cloudy weather, trim these to maintain a bushy habit.
Beans can start to be picked 8 – 10 weeks after sowing.
Regular picking will help promote a longer harvest season.

Tatsoi is a delicious nutrient rich Asian green that can be used in stir fries and salads or simply lightly steamed or sautéed and tossed with oyster sauce and sesame oil. Its attractive round crinkled leaves can also be used as a peppery spinach or silverbeet substitute. Tatsoi is perfect for growing at home as its compact and fast growing, providing an ongoing supply of delicious leaves over many weeks.
Here’s how to grow your very own tatsoi from Yates Tatsoi Spoon Mustard:
Pick a spot in full sun or part shade, out in the vegie patch or in containers.
Sow seed 6 mm deep direct where the tatsoi is to grow and cover with Yates Black Magic Seed Raising Mix. Give each plant around 30 cm of space to grow.
Firm down and keep the soil or potting mix moist. Seedlings will emerge in around 5 days.
Feed tatsoi plants each week with Yates Thrive Fish Blood Bone plant food Concentrate, which is a rich fish and humate based formulation boosted with additional nutrients. It provides a complete diet for tatsoi and helps promote lots of healthy and delicious leaf growth.
You can start picking tender young tatsoi leaves from around 3 weeks. The plants will continue to grow and can be repeat harvested. Continuous picking will help promote fresh new leaf growth.
Sow additional tatsoi seed every few weeks between spring and autumn so you have an ongoing supply.
Pest watch: like other brassica vegies, tatsoi can be attacked by caterpillars and aphids. Protect tatsoi plants with Yates Natures Way Natural Insect Spray Pyrethrum Concentrate Natural Insect Spray, which contains pyrethrin, which is a natural extract from the pyrethrum daisy. Spray tatsoi plants each week, including the undersides of foliage where pests often hide, while caterpillars and aphids, or their damage, are noticed.

If you have a few spare square metres in a sunny spot in your garden, then try growing some of your own sweet corn. Home grown is spectacular and once you have eaten it fresh from the garden it will be hard to go back to store bought. It’s so sweet and juicy!
Yates Sweet Corn Sun n Snow and Sweet Corn Honeysweet are two of the delicious sweet corn varieties to choose from. Sun’n’Snow produces bi-coloured cobs with yellow and white kernels that combine superb flavour with rich, succulent super sweetness. Honeysweet is an early maturing variety with large, even cobs of sweet golden kernels.
Here’s how to grow your own corn:
Enrich the soil in a sunny garden bed by mixing in some Yates Dynamic Lifter Organic Plant Food. It’s best to grow corn in blocks of short rows (rather than long thin rows), which helps to improve pollination and yield.
Sow corn seeds in pairs, 25 mm deep, in moist well-drained soil direct where they are to grow. No further watering is needed until seedlings appear. The weaker of the two seedlings can be thinned out when they reach around 15 cm tall.
Corn is a hungry plant and should be fed each week with Yates Thrive All Purpose Soluble Plant Food.
Monitor corn plants for aphids and caterpillars and spray each week with Yates Natures Way Organic Citrus, Vegie Ornamental Spray Ready to Use to control both these common insect pests. Based on natural ingredients, it’s certified for use in organic gardening.
Pick cobs when the fine ‘silk’ has just browned.

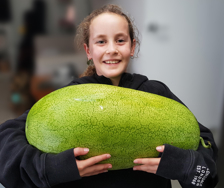
Potatoes unfortunately don’t count towards your 5 a day vegie goal, but thankfully delicious Kumara do! They’re rich in vitamins and minerals, have a low GI and are high in carotenoids, which are great antioxidants.
Some of the most common varieties of kumara include ‘Beauregard’ which has orange skin and flesh, red skinned ‘Owairaka Red’ which has white flesh with purple streaks and golden ‘Toka Toka Gold’.
If you have a warm sunny spot and a frost-free window of 5 months, you can grow your own kumara at home. Kumara plants are vigorous vines that will grow over the ground, with the edible tubers developing below ground. They can be started from tubers, potted plants (available in garden centres) and also ‘slips’, which are shoots taken from a sprouting kumara tubers.
Prepare and enrich the soil before planting kumara by digging in some Yates Dynamic Lifter Organic Plant Food. This will add valuable organic matter to the soil and provide the establishing plants with gentle, slow release organic nutrients. Apply further Yates® Dynamic Lifter® around the root zone every 6 weeks to encourage healthy leaf growth and the development of lots of kumara tubers. As the plants develop you can pick some of the nutritious and tender new leaves and steam them or use them in stir fries.
Keep an eye out for sap sucking insect pests like aphids and whitefly and control with weekly sprays of Yates Natures Way Vegie Insect Spray Natrasoap Concentrate, applying both on the upper and lower leaf surfaces where these insects often hide.
After around 5 months (or once the vines start to yellow) you can start to gently feel under the ground for tubers and harvest as you need them.
Space saver tip: in smaller gardens, try growing a few kumara plants along and up a trellis. They will need to be tied gently to the trellis as they grow, as their preference will be to grow along the ground. Kumara can also be grown in a large, well-drained container, ensuring the soil is kept moist and the plants well fed.

Cos Lettuce, sometimes called Romaine lettuce, is the leafy basis for delicious Caesar salad. Yates Lettuce Cos has a sweet and interesting taste that is quite distinct from other lettuces, with thicker, crisper leaves. Upright and cylindrical, it forms tall loose heads. The leaves can be picked individually as required or the whole head harvested.
Yates® Cos Lettuce can be grown in either a sunny vegie patch or in pots. Seed can be sown in temperate zones during October. In cool zones, delay sowing until November.
Here’s how to grow your own Cos lettuce:
Before sowing Yates® Cos Lettuce seed in the vegie patch, improve the soil first with some Yates Dynamic Lifter Organic Plant Food. The rich organic matter in Yates® Dynamic Lifter® absorbs water like a sponge, helping to keep plants moist and also provides vegies with gentle, slow release organic nutrients as they establish.
When growing in pots, use a good quality potting mix like Yates Premium Potting Mix and a well-drained pot.
Sow seed 3 mm deep direct where you want the lettuce to grow, keep the soil or potting mix moist and seedlings will pop up in 7-10 days.
Once the seedlings are established, apply some Yates Thrive Natural Fish Seaweed+ Plant Food Concentrate around the root zone. It’s a complete plant food for vegies like lettuce and will encourage lots of healthy leaf growth.
Seed raising tip: you can also sow Yates® Cos Lettuce in punnets of Yates Black Magic Seed Raising Mix and transplant the seedlings into their final position when they’re 3-4 cm high.
Aphid watch: aphids are sap sucking insect pests that are attracted to the soft tender young growth on lettuces. They can adversely affect plant health and reduce your harvest. Aphids are easy to control with Yates Nature’s Way Natrasoap Vegie Insect Gun Ready to Use, which is an insecticidal soap spray that is certified for use in organic gardens.

There are a few different versions of the origins of the Yates Tomato Mortgage Lifter Heirloom variety of tomato, however the most popular seems to be based around a man known as ‘Radiator Charlie’. In the 1930s, Marshall Cletis Byles worked at a repair shop in a small town in West Virginia in the United States. His specialty was repairing truck radiators and his nickname became ‘Radiator Charlie’.
Desperate financial times during the Great Depression forced Marshall to look for additional income and he decided to try breeding a large tomato to help feed hungry families. With minimal horticultural experience he started to cross pollinate 4 different tomatoes (including the variety ‘Beefsteak’) and over several years developed a large and tasty tomato which was first known as ‘Radiator Charlie’s Tomato’. He had great success selling the seedlings and was able to pay off his mortgage with the proceeds. The tomato became known as ‘Radiator Charlie’s Mortgage Lifter’ and is now sold worldwide as ‘Mortgage Lifter’.
Yates Tomato Mortgage Lifter Heirloom produces very large, great tasting pinkish fruit which can weigh up to 1.5 kg. Yes, 1.5 kg! That’s one impressive tomato Radiator Charlie! It’s a prolific bearer and must be staked or grown inside a tomato cage.
Here’s how to get your Yates Mortgage Lifter Tomatoes started:

Seed can be sown direct into a sunny vegie patch that’s had the soil enriched with some Yates Thrive® Natural Blood & Bone or sown into seedling punnets filled with a good quality seed raising mix like Yates Black Magic Seed Raising Mix
Sow seed 6 mm deep, cover with seed raising mix and water gently.
Keep the soil or seed raising mix moist and seedlings will start to emerge in around 5 – 7 days.
For seedlings raised in punnets they can be transplanted into their final home when they’re 5 cm tall.
Water in with some Yates Thrive Natural Seaweed Tonic to help reduce transplant shock and get seedlings off to a great start.
Here’s how to care for your Yates® Mortgage Lifter Tomatoes:
Once the seedlings have been in the garden for around a fortnight, start feeding each week with Yates Thrive Tomato Liquid Plant Food, which will provide the tomatoes with a balanced diet of nutrients to promote lots of healthy growth and additional potassium to encourage lots of flowers which will turn into delicious fruit.
Protect tomato plants from common insect pests like fruit worm caterpillars, aphids and tomato potato psyllid (TPP) by applying Yates Mavrik Insect Mite Spray Ready to Use Insect and Mite Spray over the foliage every 7 – 14 days.
Control common tomato diseases such as powdery mildew and blights by spraying plants with Yates Nature’s Way Fungus Spray every 10 – 14 days, ensuring thorough coverage of foliage.


Share
Share this article on social media