


Yates Thrive Natural Seaweed
A seaweed tonic for plant and root health, to improve plant resistance for protection against drought and frosts. Ideal for soaking plant roots, to reduce stress from transplanting.
Create a Yates account today!
Sign up to join the Yates Garden Club for monthly e-mails packed with seasonal inspiration, tips for success & exclusive promotions.
Plus if you’re a Garden Club member you can take part in the Yates Growing Community - a blog to share successes, get advice & win prizes in fun challenges along the way!
Enter the email address associated with your account, and we'll email you a new password.

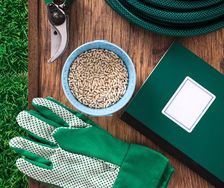
Potatoes are a delicious and productive vegie to grow at home and can even be grown in bags or pots. It’s best to use seed potatoes rather than supermarket potatoes as seed potatoes are certified disease free; they also haven’t been sprayed with sprouting inhibitors. Seed potatoes will be available for winter planting from your favourite garden retailer.
Potatoes prefer a deep, slightly acidic soil with good moisture levels. Before planting, enrich the soil first by digging in some Yates Thrive Natural Blood & Bone which will add valuable organic matter to the soil, help to improve soil structure and attract earthworms and beneficial soil microorganisms.
For pots, use a well-drained container or special potato bag and fill with a 20cm layer of good quality potting mix, such as Yates Premium Potting Mix.
Plant the seed potatoes around 15cm deep into the soil or potting mix and then apply a 5cm mulch layer of pea or lucerne straw.
The potatoes will start to sprout in a few weeks and green stems and leaves will develop.
As green shoots emerge through the mulch after around a month, apply an additional 15cm layer of soil, another sprinkling of Yates Thrive Natural Blood & Bone and more mulch on top. Mulch protects the potatoes from sunlight (which turns spuds green and inedible). Keep repeating this process, to cover the new shoots as they appear. The gradually increasing layers encourage longer stems to form in the extra depth of soil (which gets you a bigger crop of potatoes).
Keep the soil or potting mix consistently moist.
It takes about 4 months for potatoes to fully mature. When flowers appear, or the plant starts to yellow that indicates they're ready to harvest.
Impatient gardeners can harvest some tender baby potatoes a little earlier by gently feeling around under the mulch and plucking out individual spuds. This sneaky method is called 'bandicooting'.
A note on frost – if you live in a cold area, it’s important that the new potato stems aren't exposed to frost, so delay planting to make sure stems emerge after the chance of frost has passed.
Tip: before planting, put seed potatoes into a well-lit (out of direct sunlight) spot for a few weeks so they develop small shoots (this process is called ‘chitting’). This helps to give potatoes a head start before they go in the ground.

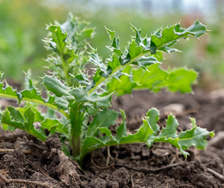
Warmer weather isn’t too far away, so it’s time to think about fresh and delicious home-grown salad ingredients like lettuce.
Yates Lettuce Cut & Come Again grows a continual supply of delightfully fresh and colourful salad leaves. Simply snip leaves off the plant as you need them. They’ll be ready to harvest in just 6 weeks after sowing, so get your salad bowl ready!
Sow Yates Lettuce ‘Cut & Come Again’ seed direct where they are to grow in a sunny or partly shaded spot in the vegie garden or pots.
Keep the soil or potting mix moist and seedlings will pop up in around 4-7 days.
It’s important to regularly feed your lettuces to promote healthy growth and a great harvest. Feed each week with Yates Thrive Vegie Herb Liquid Plant Food, which is a complete and balanced plant food containing nitrogen for vibrant green leaf growth, phosphorus for strong root development and potassium for healthy plants.
Mulching around the lettuces with an organic mulch like pea or lucerne straw will help keep the soil moist. When watering lettuces, it’s best to water around the base of the plant rather than overhead, which helps minimise the risk of disease.
Aphids can be attracted to and damage the tender young lettuce seedlings. Aphids can be black, grey, brown or very well camouflaged green. Control aphids by spraying each week with Yates Natures Way Vegie Insect Spray Natrasoap, a soap-based spray that’s certified for use in organic gardening.
Keep an eye out for voracious snails and slugs too, which can be controlled with a light sprinkling of Yates Blitzem Snail Slug Pellets.
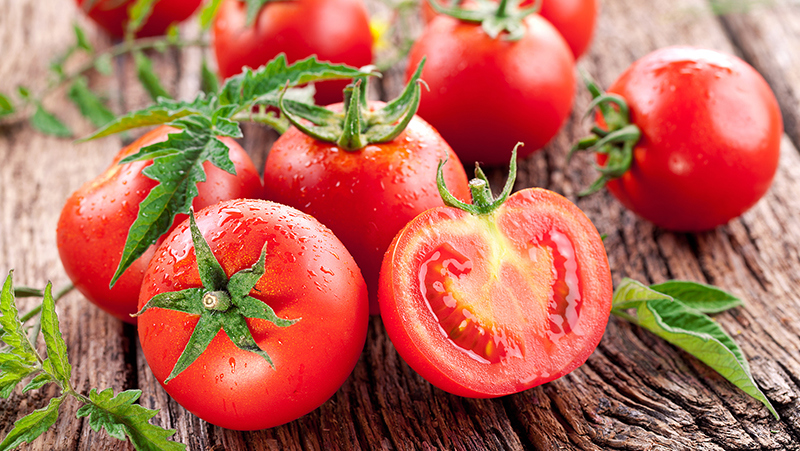
For home grown tomato-lovers in temperate areas, it can seem like a very, very long winter.
Have you been just itching to get your tomatoes going? The arrival of August means that you can start off tomato seeds on a warm, bright windowsill, so the seedlings are ready for planting out as soon as any chance of frost has passed.
For all you tomato addicts with a vegie patch, try Yates Tomato Mortgage Lifter Heirloom, an heirloom variety that produces lots of large, pink tinged fruit. For smaller spaces and pots, try Yates Tomato Patio Mini, a dwarf tomato with masses of sweet bite-sized tomatoes.
Fill some empty seedling punnets with a good quality seed raising mix like Yates Black Magic Seed Raising Mix.
Sow seed 3 – 6mm deep (check your chosen variety for the correct sowing depth), cover with seed raising mix and water gently.
Place the punnets in a warm, sunny spot. A brightly lit windowsill is ideal.
Keep the mix moist and seedlings will start to emerge in around 10 – 14 days.
When the seedlings are around 5cm tall, they can be transplanted into their final home, in either a garden bed that’s been enriched with some handfuls of Yates Thrive Natural Blood & Bone or a container. Only transplant out once there will be no more frosts!
Water in newly transplanted seedlings with Yates Thrive Natural Seaweed Tonic, which will help to reduce transplant shock and get the seedlings off to a great start.
In a fortnight, start feeding each week with Yates Thrive Tomato Liquid Plant Food, which will provide the tomatoes with a balanced diet of nutrients to promote lots of healthy growth and encourage lots of flowers which will turn into delicious fruit.

Carrots have a low glycaemic index (GI) and are a great source of nutrients like vitamin K and vitamin B6, as well as potassium. Carrots are packed with beta-carotene, which is the pigment that makes carrots orange. Our bodies convert this beta-carotene into essential vitamin A, then convert some of that vitamin A into a light-sensitive substance called Rhodopsin, that plays a key role in powering our eyesight.
Growing carrots at home can sometimes be challenging, especially during warm seasons. The seeds are small and aren't sown very deeply, making them very prone to drying out.
Cooler weather during winter usually helps keep the soil moist, giving the tiny seeds ideal conditions to germinate and establish.
Yates Carrot Topweight are a favourite for August sowing, all around New Zealand.


Share
Share this article on social media